Small Block Chevy 350 Build Pt. 6 | This Is How It's Actually Supposed To Be Done
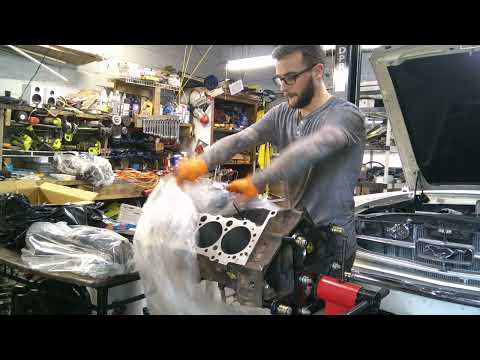
This video covers the correct way to assemble and torque up a Small Block Chevy 350 engine, focusing on installing and properly torquing the heads, timing set, and valve train components. The build emphasizes correct sequences, degreeing/checking timing, and setting valvetrain geometry to ensure reliable operation.
Build Sequence
1. Prep block and clean surfaces
Thoroughly clean all mating surfaces (deck, block rails, cam gallery area) and verify the block is ready for assembly. Ensure oil passages are clear and install any required freeze plugs or cam bearings beforehand.
2. Install oil pump and pickup
Prime and install the oil pump and pickup, ensuring proper drive alignment and clearances. Torque pump fasteners to spec and verify pickup is sealed to oil pan rail.
3. Install timing set and align timing
Install the timing chain and gears, align timing marks per cam and crank orientation, and verify timing cover fitment. If degreeing the cam, mount the degree wheel and use a dial indicator to confirm cam timing.
4. Install cylinder head gaskets and heads
Place the MLS head gaskets on the deck, set the cylinder heads in position, and hand-start ARP head studs or bolts. Follow the manufacturer's torque sequence and incremental steps to final torque.
5. Install lifters, pushrods, and rockers; set preload/valve lash
Fill lifters with assembly lube if hydraulic, install lifters, drop in pushrods, install rocker arms and torque to spec. Set rocker geometry and lifter preload or valve lash according to cam and head recommendations.
6. Install intake manifold and accessories
Place intake gaskets and torque the intake manifold bolts in the proper sequence. Install carburetor (or throttle body), fuel lines, valve covers, harmonic balancer, and other accessories.
7. Rotate engine, check for interference and final checks
Manually rotate the engine several revolutions, check for valve-to-piston clearance if applicable, verify oil pressure path, and ensure there are no binding points in the valvetrain. Re-check torque on critical fasteners.
8. Final assembly, fluids and prep for startup
Install remaining external seals, connect sensors and plumbing, fill with oil and coolant as required, prime oil system if possible, and prepare for initial startup and break-in procedure.
Frequently Asked Questions
What torque sequence and values should I use for SBC heads?
Follow the head gasket and fastener manufacturer's torque sequence and specs. A common approach is incremental torquing (e.g., 30-50-70 ft-lb depending on bolt type) in a spiral pattern from center out, but always verify with the specific parts' instructions.
VIEW FULL ARTICLE →What should I do to prepare the engine for first start and break-in?
Prime the oiling system, use recommended assembly lube on cam lobes and lifters, verify all connections and clearances, and follow a proper break-in procedure (controlled RPMs, avoiding heavy loads, and recommended oil change interval after break-in).
VIEW FULL ARTICLE →How important is degreeing the cam?
Degreeing the cam is critical for performance builds and any time the timing set, pistons, or cam were changed; it ensures the cam events occur where expected and can prevent piston-valve interference and optimize power. For a stock rebuild it may not always be required but it's a best practice.
VIEW FULL ARTICLE →Do I need ARP head studs or are stock head bolts okay?
ARP head studs are recommended for performance and repeated assembly because they provide more consistent clamping and are less prone to stretching; stock bolts may be acceptable for a mild, single-assembly build but proper torque and replacement are important.
VIEW FULL ARTICLE →How do I set lifter preload or hydraulic lash?
For hydraulic rollers, preload is typically set by tightening the rocker arm to recommended torque with the lifter on the base circle, then turning the pushrod/nut to achieve the specified preload (or follow the manufacturer's procedure). For hydraulic flat tappets, follow the valve adjustment procedure specific to the lifter and rocker setup.
VIEW FULL ARTICLE →Related Builds
 Small Block Chevy 350 Build Pt.3 | Filing rings and checking main clearances
 Small Block Chevy 350 Build Pt.5 | Continued frustrations with rod clearances
 Small Block Chevy 350 Build Pt. 11 | Installing the intake manifold and figuring out sbc nuisances
 Small Block Chevy 350 Build Pt. 7 | Checking Crank Clearance and installing the rods.
 Small Block Chevy 350 Build Pt. 8 | Installing Camshaft and timing components
 Small Block Chevy 350 Build Pt.1 | Lifting This Engine Without Breaking It
Parts Used (12)
Multi-layer steel head gasket set for small block Chevy; used when installing cylinder heads.
Timing chain and gear set for SBC 350; used to index and time the cam correctly.
Aluminum intake manifold commonly used on small-block Chevy performance builds.
Street carb for initial tuning and startup after assembly.
Hydraulic roller lifters commonly used; lifter preload must be set correctly.
Replace to prevent oil leaks after valve cover installation.
Seals and gaskets needed for reassembly to prevent leaks.
Stamped or roller rockers chosen to match valve train; torque spec and geometry important.