Small Block Chevy 350 Build Pt. 15 | Installing the harmonic balancer and testing the oil pump
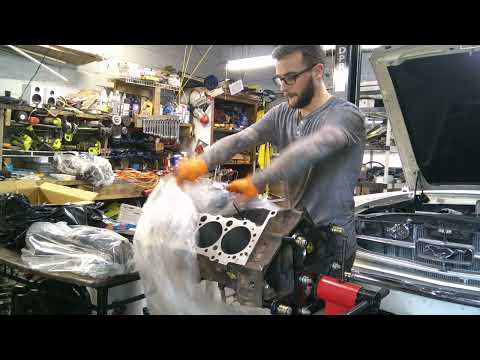
This episode covers installing the harmonic balancer (damper) onto the Small Block Chevy 350 crankshaft and then bench-testing/priming the oil pump to verify flow and operation. The video walks through seating the crank key, pressing the balancer on correctly, torquing the crank bolt, and then verifying the oil pump delivers oil when primed.
Build Sequence
1. Prepare crank snout and install crank key
Clean the crank snout and keyway area. Install the crankshaft key (Woodruff or rectangular) into the keyway and ensure it is fully seated and aligned.
2. Install front crankshaft seal (if applicable)
If replacing the front seal, install the seal into the timing cover bore before installing the balancer (or follow the seal/balancer sequence required by your seal type). Lightly lubricate the seal lip with oil or assembly lube.
3. Press harmonic balancer onto crank with installer
Use a harmonic balancer installer or shop press to evenly press the balancer onto the crank snout over the key. Do not hammer the balancer on — use the installer to avoid damaging the harmonic damper.
4. Torque crankshaft bolt to specification
With the balancer fully seated, install the crankshaft bolt and washer. Use a torque wrench to tighten the bolt to the manufacturer's specified torque (and angle if required). Verify the balancer is fully seated and aligned.
5. Install oil pump and pickup (if not already installed)
Assemble the oil pump and pickup or verify the pump is correctly assembled. Install any required gaskets or seals and bolt the pump into place following required torque values. Ensure pickup tube is secured and screen is clear.
6. Bench test / prime the oil pump
Mount the oil pump in a vise or test fixture, attach pickup hose into an oil reservoir, and use an electric drill (with appropriate coupler) to spin the pump. Observe oil flow into the catch container to confirm the pump is priming and delivering oil.
7. Final inspection and cleanup
Check for leaks, confirm fasteners are torqued, wipe down components, and ensure everything is ready for engine assembly/installation. Dispose of or recycle used oil and clean tools.
Frequently Asked Questions
How do you test an oil pump on the bench?
Mount the oil pump securely, attach the pickup into an oil reservoir, and drive the pump gear with a drill or suitable driver. Verify oil is drawn up the pickup and flows out of the pump outlet to confirm priming and flow.
VIEW FULL ARTICLE →What are signs of a bad harmonic balancer?
Look for visible separation of the rubber isolation layer, wobble when spun, unusual vibrations, or noise. A failed balancer can cause excessive engine vibration and accelerated wear.
VIEW FULL ARTICLE →What torque should I use on the crankshaft bolt?
Torque specifications vary by crank bolt and application; follow the manufacturer or parts supplier spec for your SBC 350 crank bolt (many aftermarket bolts require a torque plus an angle). If unsure, consult the bolt manufacturer or a factory manual.
VIEW FULL ARTICLE →Should I replace the crankshaft seal when installing the balancer?
Yes — it's a good practice to install a new front crankshaft seal during balancer installation to prevent future leaks, unless the seal is known to be new and compatible with your installation sequence.
VIEW FULL ARTICLE →Related Builds
 Small Block Chevy 350 Build Pt. 6 | This Is How It's Actually Supposed To Be Done
 Small Block Chevy 350 Build Pt.3 | Filing rings and checking main clearances
 Small Block Chevy 350 Build Pt.5 | Continued frustrations with rod clearances
 Small Block Chevy 350 Build Pt. 11 | Installing the intake manifold and figuring out sbc nuisances
 Small Block Chevy 350 Build Pt. 7 | Checking Crank Clearance and installing the rods.
 Small Block Chevy 350 Build Pt. 8 | Installing Camshaft and timing components
Parts Used (5)
Front crankshaft damper; installed onto crank snout, secures with crank bolt.
Standard SBC 350 mechanical oil pump used to circulate oil; tested on bench after installation.
Positions the harmonic balancer on the crank snout; ensure correct orientation and seating.
Torque to spec to secure balancer. Consider replacing one-time-use stretch bolts with new OEM-style bolt.
Replace or install seal behind the balancer to prevent leaks. May be installed before or after balancer depending on seal type.