Small Block Chevy 350 Build Pt. 14 | Installing the oil pump, timing cover and oil pan
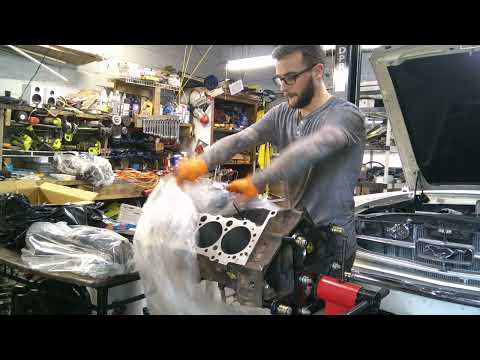
This episode covers installing the oil pump, timing cover, and oil pan on a Small Block Chevy 350 engine. The video walks through preparing and cleaning sealing surfaces, bolting and aligning the oil pump and pickup, installing the timing cover (and front crank seal), and sealing and torquing the oil pan.
Build Sequence
1. Prepare and clean sealing surfaces
With the engine on the stand, remove any old gasket material, oil, and debris from the block mating surfaces for the oil pump, timing cover, and oil pan. Inspect the block for nicks or warpage and ensure bolt threads are clean.
2. Install oil pump pickup and gasket
Assemble the oil pump pickup tube to the oil pump or block using the correct gasket or O-ring and bolts. Torque bolts to spec and verify pickup screen is clean and positioned correctly above the pan rail.
3. Install oil pump to block (align and torque)
Install the oil pump making sure the drive tang/shaft engages the crank correctly. Apply appropriate sealant or gasket if required, fit the pump to the block, and torque the mounting bolts to the manufacturer's specification while ensuring proper pump rotation freely.
4. Install front crank seal into timing cover
Press the front crank seal into the timing cover using a seal installer tool to avoid damage. Verify seal lip orientation and that it sits flush in the cover.
5. Fit timing cover with gasket/RTV and torque
Apply gasket or the recommended RTV to the timing cover and block, align the timing cover over the timing chain/gears, and install bolts. Torque bolts in a cross pattern to spec and ensure the cover is seated evenly without binding the timing components.
6. Install oil pan gasket or apply RTV
Position the oil pan gasket or apply RTV to the pan rail as recommended. Carefully lift the oil pan into place over the pickup and install bolts by hand to align. Tighten bolts finger-tight initially to ensure correct fit.
7. Torque oil pan bolts in sequence
Torque the oil pan bolts to the specified torque in a criss-cross pattern, working from the center outward to distribute sealing pressure evenly. Install drain plug and inspect for correct clearance to the pickup.
8. Final inspection and cleanup
Check all fasteners for correct torque, ensure no RTV squeeze-out in oil passages, rotate the crank by hand to confirm no interference, and clean off any excess sealant. Allow RTV to cure per manufacturer's directions before filling with oil and starting.
Frequently Asked Questions
Do I need to prime the oil pump before first start?
Yes—priming the pump (filling it with oil and rotating the engine by hand to circulate oil) is recommended before first start to prevent dry start wear. If priming isn't possible, crank the engine in short bursts and check oil pressure immediately.
VIEW FULL ARTICLE →What do I do if I see RTV squeeze-out into oil passages?
Remove excess RTV carefully with a shop rag or by disassembling if necessary; avoid leaving blobs that could break off and circulate. Preventative measure: apply moderate, even bead and avoid over-application near oil passages.
VIEW FULL ARTICLE →What torque specs should I use for oil pump, timing cover and oil pan bolts?
Use the manufacturer's torque specs for the specific hardware. Typical ranges: oil pump bolts ~20-30 ft-lbs, timing cover bolts ~15-25 ft-lbs, oil pan bolts ~10-20 ft-lbs. Verify with a Chevy SBC torque chart for exact values.
VIEW FULL ARTICLE →How do I know the oil pump pickup is positioned correctly?
The pickup screen should be a few millimeters above the bottom of the oil pan rail (not touching the pan) and securely fastened with no leaks at its flange. Confirm clearance and that the pickup isn't contacting the pan or any internal parts.
VIEW FULL ARTICLE →Should I use a gasket or RTV for the timing cover and oil pan?
Both methods are common. Use the gasket type recommended by the part manufacturer; RTV can be used where gaskets are not available or in addition to gaskets at corners and seams. If using RTV, follow cure times before running the engine.
VIEW FULL ARTICLE →Related Builds
 Small Block Chevy 350 Build Pt. 6 | This Is How It's Actually Supposed To Be Done
 Small Block Chevy 350 Build Pt.3 | Filing rings and checking main clearances
 Small Block Chevy 350 Build Pt.5 | Continued frustrations with rod clearances
 Small Block Chevy 350 Build Pt. 11 | Installing the intake manifold and figuring out sbc nuisances
 Small Block Chevy 350 Build Pt. 7 | Checking Crank Clearance and installing the rods.
 Small Block Chevy 350 Build Pt. 8 | Installing Camshaft and timing components
Parts Used (8)
High-temp RTV used where required (front cover corners, pan ends). Follow manufacturer's cure time before starting engine.
Standard replacement oil pump for SBC 350. Ensure correct pickup clearance and drive tang engagement.
Often sold separately or included with the pump; confirm gasket or O-ring for pickup to block seal.
Press-in seal for crankshaft through the timing cover. Use proper installer to avoid distortion.
Gasket set for front cover and oil pan. Some builders use RTV in place of or in addition to gaskets.
Replacement bolts or studs for oil pan and timing cover; inspect and reuse if in good condition.