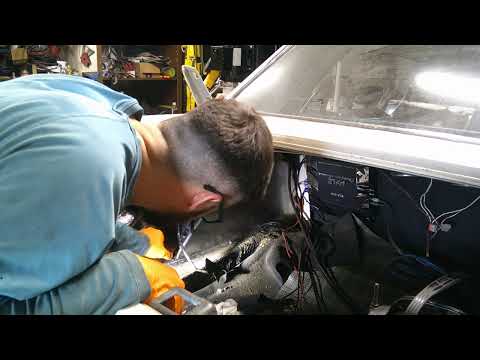
From cuts to custom fender wells on my Mustang Pt 5
This video documents cutting away damaged/old inner fender material and fabricating custom fender wells for the Mustang. The build covers measuring and trimming the original metal, shaping new sheet-metal or panels, test-fitting and welding/tacking the new wells, then finishing with grinding, seam sealer and primer to prepare for final paint and reassembly.
Build Sequence
1. Plan, measure and mark cut lines
Inspect the existing inner fender and outer wheelwell area, determine where to cut for access and replacement, and lay out cut lines. Measure twice to establish the amount of metal to remove and where the new patch panels will locate relative to suspension clearance.
2. Remove old material and separate panels
Use a spot weld cutter, angle grinder or saw to remove rusted or damaged sections and separate the inner wheelwell from attached panels. Remove any factory spot welds carefully to preserve surrounding structure.
3. Create and shape patch panels
Cut sheet steel or prepare preformed inner panels to match the wheelwell contours. Use hammer and dolly, shrinker/stretcher or careful grinding to shape the metal so it fits snugly against the car's profile.
4. Test-fit and clamp panels
Dry-fit the fabricated panels, adjust as needed, and secure with clamps or clecos. Ensure suspension and tire clearance are acceptable and that gaps align with adjacent body seams.
5. Tack weld and stitch the seams
Tack weld the panel in multiple locations to pull it into place, then stitch-weld or plug-weld along the seam in short passes to prevent heat warping. Apply weld-through primer as necessary to protect bare metal.
6. Grind welds and finish seams
Grind welds flush where required, blend the transitions, and fill any low spots with body filler. Smooth filler with a file and sanding block to get a uniform surface.
7. Seal, protect and prime
Apply seam sealer to all welded joints and any potential moisture traps. Coat repaired areas with primer and any weld-through corrosion protection to prepare for paint and reinstallation of liners.
8. Reinstall liners and hardware; final checks
Reinstall the plastic fender liner or splash shield using new fasteners, torque any suspension bolts if removed, and check tire clearance and alignment. Make any final adjustments before painting.
Frequently Asked Questions
What finish work is needed after welding the new wells?
Grind and blend welds, apply body filler to smooth transitions if necessary, then seam seal all joints and prime with corrosion-resistant primer. Final paint or undercoating and reinstallation of liners completes the job.
VIEW FULL ARTICLE →Do I need to remove the fender to make custom wheelwells?
Not always. Many cuts and inner wheelwell fabrications can be done with the fender on, but removing the fender gives easier access and cleaner edges. The video shows work done with targeted cuts and selective removal rather than full fender off in many areas.
VIEW FULL ARTICLE →What gauge of steel should I use for custom fender wells?
Typical practice is 18 gauge (around 1/16") for inner wheelwell and patch panels to match OEM thickness and maintain formability. Heavier steel makes shaping and welding more difficult and can add unnecessary weight.
VIEW FULL ARTICLE →How do you prevent warping when welding large panels?
Use short stitch welding or tack welds spaced apart to pull the panel in gradually, allow cooling between welds, and use clamps or fixtures. Grinding and planishing can also help, and using a weld-through primer protects against corrosion.
VIEW FULL ARTICLE →Related Builds
 From cuts to custom fender wells on my Mustang - FINAL
 From cuts to custom fender wells on my Mustang Pt 6
 From cuts to custom fender wells on my Mustang pt 2
 From cuts to custom fender wells on my Mustang Pt 4
 From cuts to custom fender wells on my Mustang
 From cuts to custom fender wells on my Mustang part 3
Parts Used (10)
Optional — used if a preformed panel is available to speed installation.
Replaces trimmed/damaged liner or used to protect the new metal.
Used to temporarily secure liners or panels where welding isn't used.