From cuts to custom fender wells on my Mustang
This video documents cutting the stock inner fender and fabricating custom fender wells (wheel tubs) on a Mustang to gain additional tire clearance and tidy up the wheelhouse. The build covers marking and cutting the factory metal, shaping or installing new wheel tubs, welding them into place, grinding/smoothing welds, sealing and prepping the area for bodywork and primer.
Build Sequence
1. Prep and access wheelhouse
Safely lift the car, remove the wheel and any wheel liner or trim to expose the inner fender/inner wheelhouse. Clean the area of dirt and undercoating to see the metal clearly and mark the work area.
2. Measure and mark cut lines
Mock-fit the wheel/tire combination and mark clearance lines inside the fender. Transfer layout lines for where factory metal will be cut and where new tubs or panels will terminate.
3. Remove factory metal (cutting)
Use an angle grinder/cutoff or nibbler/air tools to remove the outlined sections of the inner fender. Remove any spot welds as needed and clean the remaining flange for attachment.
4. Mock-fit and template new tubs
Shape sheet metal or test-fit aftermarket tubs inside the cut area, trimming and adjusting until the tub provides the desired clearance and sits against usable flange material. Use clamps and temporary fasteners for fit checks.
5. Tack and weld tubs/panels in place
Tack-weld the tubs or patch panels to the car, checking fit as you go to avoid warping. Complete plug welds or seam welds along the mating surfaces, using short welds and cooling periods to reduce heat distortion.
6. Grind welds and smooth transitions
Grind down welds with a flap disc and blend seams into the surrounding metal. Use a hammer and dolly for reshaping where heat caused distortion and make sure the wheelhouse is smooth for bodywork.
7. Seal seams and apply body filler
Apply seam sealer to welded joints to prevent moisture intrusion. Feather in body filler over welded areas to smooth any imperfections and sand to a consistent contour.
8. Prime and protect bare metal
Prime all bare metal and repaired areas with an appropriate primer (etch or epoxy) to protect against corrosion and prepare for any final paint or coatings used in the wheelwell.
9. Reassemble and final clearance check
Reinstall the wheel and any liners or splash shields that fit with the new tubs. Check full suspension travel and steering lock to ensure no rubbing occurs. Make final adjustments if necessary.
Frequently Asked Questions
Do I need a welder to do this, or can I rivet the tubs in?
Welding provides the strongest, most permanent result and maintains structural integrity. Rivets or screws can be used for a less permanent or simpler installation, but they may require seam sealer and will not be as durable as welds.
VIEW FULL ARTICLE →How much extra tire/wheel clearance can I expect?
Clearance gained depends on how much factory metal you remove and how the tubs are shaped. Typical gains are several inches of tire width or diameter, but you should mock-fit with the actual wheel/tire and check suspension travel and steering lock.
VIEW FULL ARTICLE →How difficult is this for someone with limited metalworking experience?
This project ranges from intermediate to advanced because it requires accurate cutting, metal shaping, and welding. Beginners can participate in prep, fitting, and sealing steps, but welding and shaping require practice or professional help.
VIEW FULL ARTICLE →Will this change how the suspension or alignment behaves?
Cutting and installing tubs alone doesn't change suspension geometry, but using wider wheels/tires that require the tubs can affect handling and may require alignment, roll center correction, or fender trimming to avoid rubbing over bumps.
VIEW FULL ARTICLE →Related Builds
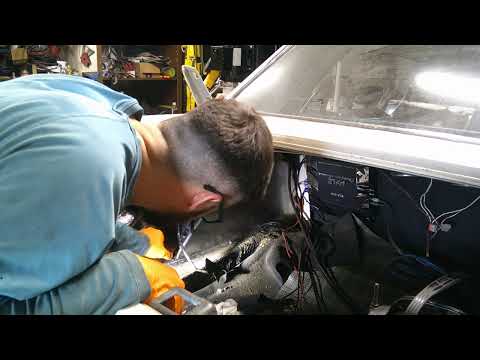 From cuts to custom fender wells on my Mustang - FINAL
 From cuts to custom fender wells on my Mustang Pt 6
 From cuts to custom fender wells on my Mustang pt 2
 From cuts to custom fender wells on my Mustang Pt 4
 From cuts to custom fender wells on my Mustang Pt 5
 From cuts to custom fender wells on my Mustang part 3
Parts Used (7)
Raw steel used to form custom tubs and patch panels. Quantity depends on coverage.
Used if not fabricating from scratch; price varies widely by source and fitment.
For MIG welding seams when installing tubs; assumes a single spool.
Temporary or permanent fasteners during fitting and final assembly.