From cuts to custom fender wells on my Mustang part 3
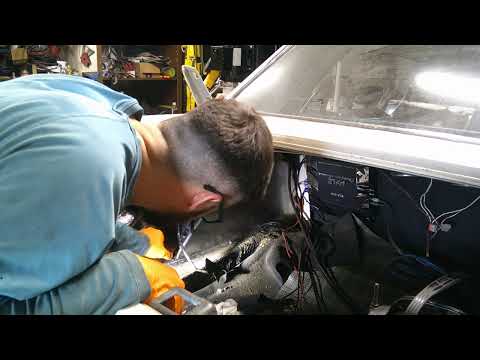
This build documents cutting the factory inner fender and fabricating custom fender wells on a Mustang to gain clearance and create a finished inner wheel arch. The job involves trimming sheet metal, shaping and welding replacement sections or flare pockets, sealing and priming the repairs, and reinstalling liners or trim for a finished appearance.
Build Sequence
1. Assess and mark cutting lines
With the wheel removed and the car supported, mock up the desired clearance and mark cut lines on the inner fender and outer wheel arch where the custom well will be formed.
2. Remove inner components and protect areas
Remove the inner fender liner, trim, and any components that would obstruct cutting or welding. Mask surrounding panels and protect brake lines, wiring and suspension from sparks.
3. Cut out factory metal
Use an angle grinder or reciprocating saw to cut along the marked lines. Remove the factory inner wheelhouse sections that interfere with the new well shape, cutting out spot welds where necessary.
4. Fit and shape replacement panels
Template and cut replacement panels from sheet metal. Use a hammer/dolly and shaping tools to fit the panels to the arch geometry and test fit repeatedly until gaps and alignment are acceptable.
5. Tack weld and adjust fitment
Clamp panels in place and tack weld at intervals to hold shape. Re-check dimensions and wheel clearance, then remove and re-shape if necessary before completing welds.
6. Complete welding and grind smooth
Finish welding seams with short stitch welds to minimize warping. Grind welds flush and blend seams to create a smooth inner wheelhouse surface.
7. Seal, prime and apply filler
Apply seam sealer to welded joints, then primer. Use body filler where needed to smooth transitions; sand between coats for a uniform surface ready for paint.
8. Reinstall liners and trim, final inspection
Trim or refit an inner fender liner, secure with rivets or screws, and reinstall any removed components. Inspect for proper wheel clearance, rubbing, and finish quality.
Frequently Asked Questions
Do I need to weld the new fender wells, or can I rivet/bolt them?
Welding gives the strongest, most permanent result and better seals against moisture. Rivets or screws can be used for removable liners or panels but may require additional sealing and can be less rigid.
VIEW FULL ARTICLE →How do I prevent warping when welding thin sheet metal?
Use short tack or stitch welds spaced apart, allow cooling between welds, grind minimal material, and clamp panels from the underside. Back-purging and using proper heat settings help reduce distortion.
VIEW FULL ARTICLE →What wheel/tire sizes can this modification accommodate?
Clearance depends on how much material is removed and how the well is formed. Mock up the wheel and suspension travel during fitting to ensure the intended wheel/tire combo clears under full droop and compression.
VIEW FULL ARTICLE →How do I protect the repaired area from rust and road debris?
Use seam sealer on all joints, primer and a topcoat of paint, and reinstall or fit an inner liner. Undercoating or rubberized spray can add extra protection against stone chips and moisture.
VIEW FULL ARTICLE →Will modifying the inner fender affect vehicle safety or inspection?
Cutting and fabricating inner wells can be safe if done correctly and corrosion-protected. Check local regulations and inspection requirements; ensure structural components (frame rails, suspension mounts) are not altered.
VIEW FULL ARTICLE →Related Builds
 From cuts to custom fender wells on my Mustang - FINAL
 From cuts to custom fender wells on my Mustang Pt 6
 From cuts to custom fender wells on my Mustang pt 2
 From cuts to custom fender wells on my Mustang Pt 4
 From cuts to custom fender wells on my Mustang Pt 5
 From cuts to custom fender wells on my Mustang
Parts Used (7)
Material used to fabricat custom fender well sections and patch panels.
Used to replace or refit the inner wheel well after modification.
Used to seal welded seams and seams to prevent moisture intrusion and rattles.
Fasteners for temporarily securing liners or trim or where welding isn't used.
Etch primer, filler primer and color/top coat to protect and finish repaired areas.
Used to smooth transitions between welded panels before priming and paint.