From cuts to custom fender wells on my Mustang Pt 4
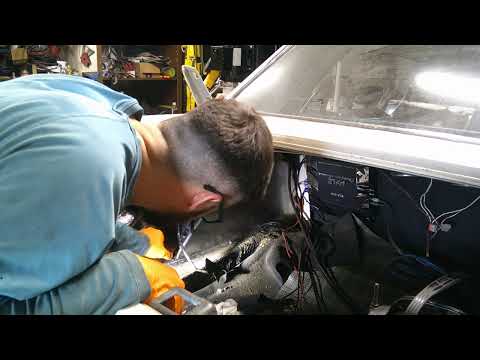
This video documents cutting the factory inner fender and fabricating custom fender wells (wheel tubs) on a Mustang to gain clearance for wider wheels/tires and altered suspension geometry. It covers cutting, shaping and fitting sheet metal, welding or fastening the tubs in place, sealing and prepping the area for paint/undercoating.
Build Sequence
1. Preparation and safety
Park the Mustang on level ground, jack up and support the car with jack stands, remove wheel and wheel liner if present. Inspect the factory inner fender to plan cut lines and measure for desired clearance.
2. Mark cut lines and back-up plan
Measure tire/wheel dimensions and suspension travel, mock-fit a pattern (cardboard or paper) to map where the new tub needs to be. Mark cut lines on the factory inner fender and outer lip, allowing margin for a flange or flange weld.
3. Cutting the factory inner fender
Use an angle grinder or cutoff wheel to cut along marked lines. Remove sections of the inner fender and clean the cut edges. Take care around factory structural points and wiring harnesses.
4. Fabricate wheel tub panels
Use measured templates to cut sheet metal panels for the new tub. Shape and flange the edges using hammers/dolly and snips. Test fit pieces repeatedly and trim for precise fit.
5. Tack weld or fasten assemblies
Clamp panels in place and tack weld around the perimeter, or use rivets/rivet nuts where welding is impractical. Progressively weld to avoid heat distortion, checking fitment to the fender and suspension components.
6. Finish welds and grind smooth
Complete welds and grind down weld beads. Fill any gaps or low spots with filler where needed and smooth transitions between existing structure and new panels.
7. Seal seams and apply corrosion protection
Apply seam sealer to all joints and spray or brush on rust inhibitor/primer to bare metal edges. Consider undercoating or textured bedliner for wheel wells for added durability.
8. Prep, paint and reassemble
Prime and topcoat the repaired area as desired, reinstall any wheel liners or trim, mount the wheel and lower the car. Verify suspension travel and wheel/tire clearance with full articulation.
Frequently Asked Questions
How much extra clearance will custom fender wells give me?
Clearance gained depends on how much metal you remove and how large the fabricated tubs are. Typically builders gain several inches of clearance for wider wheels/tires and increased suspension travel; measure with the intended wheel/tire and simulate full suspension droop and compression before finalizing panels.
VIEW FULL ARTICLE →Will cutting the inner fender affect structural integrity?
If you remove structural or suspension-mounting points it can. Avoid cutting load-bearing areas and reinforce or weld in support where necessary. Properly welded tubs and seam-sealed joints will restore rigidity for the localized area.
VIEW FULL ARTICLE →What materials and thickness should I use for the tubs?
Common choices are 18–20 gauge mild steel for fabricating tubs; stainless or aluminum are options but require different welding techniques. Thicker metal is stronger but harder to shape—18 gauge is a common compromise.
VIEW FULL ARTICLE →How do I prevent rust where I cut and weld?
Clean and prime all bare metal immediately, use an epoxy or self-etch primer, seam sealer on joints, and consider an undercoating or bedliner in the wheel well. Regular inspections and touch-ups will extend longevity.
VIEW FULL ARTICLE →Do I need to weld the tubs in or can I use rivets?
Both methods work. Welding provides a stronger, more permanent join and better seals against moisture; rivets or rivet nuts are acceptable if you prefer removable panels or lack welding equipment. Make sure to seam-seal and protect cut edges either way.
VIEW FULL ARTICLE →Related Builds
 From cuts to custom fender wells on my Mustang - FINAL
 From cuts to custom fender wells on my Mustang Pt 6
 From cuts to custom fender wells on my Mustang pt 2
 From cuts to custom fender wells on my Mustang Pt 5
 From cuts to custom fender wells on my Mustang
 From cuts to custom fender wells on my Mustang part 3
Parts Used (10)
Surface prep and corrosion protection prior to topcoat or undercoating.
Used to fabricate custom wheel tubs and repair panels; size depends on wheel well coverage required.
Alternative fastening method where welding is not used or for attaching trim/liners.
Some builders use prefabricated tubs instead of full sheet-metal fabrication. Included as an option commonly referenced in this type of build.
If using MIG welding; cost estimate for a small cylinder refill or disposable gas.
Used to smooth joints and blended transitions before primer and paint.
Finish coat for durability in wheel wells; could be textured bedliner or paint.