PT3 3 - Pulling the valve covers and timing cover of a Gen 1 Coyote to replace gaskets
This video shows removing both valve covers and the front timing cover on a Gen 1 Ford Coyote 5.0L to replace the gaskets. The build covers disassembly of related components, inspection and cleaning of mating surfaces, installation of new gaskets/seals, and reassembly with torque specifications to prevent leaks.
Build Sequence
1. Preparation and safety
Park on level ground, allow engine to cool, disconnect the negative battery terminal, and gather parts and tools. Remove any engine covers or intake trim that obstructs access to valve covers.
2. Remove ignition coils and wiring
Unplug and remove ignition coil packs and associated wiring harnesses on both cylinder heads to clear access to the valve cover bolts and spark plug tube seals.
3. Disconnect PCV hoses and ancillary lines
Label and disconnect vacuum lines, PCV hoses, breather hoses, and any electrical connectors attached to the valve covers. Remove any brackets that obstruct cover removal.
4. Remove valve cover bolts and lift covers
Loosen and remove the valve cover bolts in a criss-cross pattern, then carefully pry and lift the valve covers. Use a plastic scraper to break the seal if necessary and avoid damaging mating surfaces.
5. Inspect and clean valve cover and head surfaces
Remove old gaskets and clean both the valve cover and cylinder head mating surfaces with solvent and a plastic scraper. Inspect spark plug tube seals and replace PCV grommets as required.
6. Install new valve cover gaskets and reassemble covers
Fit new gaskets and any new grommets into place. Reinstall valve covers and torque bolts to OEM specs in the proper sequence. Reconnect hoses, wiring, and ignition coils.
7. Prepare to remove front accessories for timing cover access
Remove drive belt, accessory components (alternator, AC compressor or move aside as needed), and any radiator or fan shrouding that limits access. Drain coolant only if timing cover removal requires water pump removal—check the specific engine procedure.
8. Remove crank pulley/harmonic balancer
Remove the crank pulley/serpentine pulley; this commonly requires a pulley puller or an impact tool. Secure the crank and follow manufacturer instructions to avoid damage.
9. Unbolt and remove timing cover
Remove all timing cover bolts and carefully pry the timing cover free. Inspect for sealant spots and be mindful of any oil passage seals. Remove old gasket material and clean mating surfaces thoroughly.
10. Install new timing cover gasket and seal(s)
Position the new timing cover gasket (and crank seal if included) with any specified RTV bead as required by OEM instructions. Reinstall the timing cover and torque bolts to spec in the correct sequence.
11. Reinstall accessories and final reassembly
Reinstall crank pulley, accessory components, belts, and any removed hoses or wiring. Refill coolant if drained. Reconnect battery and start engine to check for leaks and proper operation.
12. Test drive and leak check
Run the engine to operating temperature, visually inspect for oil leaks around valve covers and timing cover, and take a short test drive. Re-torque fasteners if required after heat cycles per OEM recommendations.
Frequently Asked Questions
Will I have to drop the coolant or remove the water pump to replace the timing cover gasket?
It depends on the specific timing cover design and whether the water pump seals interface with the timing cover. In many Coyote timing cover jobs you may need to drain coolant and/or remove components that allow the cover to come off; follow the OEM service procedure.
VIEW FULL ARTICLE →What torque specs should I use for the valve cover bolts?
Use the factory torque specifications for Gen 1 Coyote valve covers — typically a low torque value in the range of approximately 8–12 ft-lbs for small cover bolts. Consult the Ford service manual for the exact sequence and value before final assembly.
VIEW FULL ARTICLE →Can I reuse the old valve cover gaskets?
It's not recommended. Old rubber gaskets become compressed and brittle; replacing them with new gaskets ensures a proper seal and prevents future leaks.
VIEW FULL ARTICLE →How difficult is the timing cover portion of this job?
Removing and replacing the timing cover is more advanced than the valve covers because it often requires removing the crank pulley and other accessories. Expect intermediate-to-advanced mechanical skill and proper tools (pulley puller, torque wrench).
VIEW FULL ARTICLE →Do I need to remove the intake manifold to remove the valve covers?
No — for a Gen 1 Coyote you generally do not need to remove the intake manifold to remove valve covers. You will remove ignition coils, hoses, and any small brackets that block access, but the intake stays in place for valve cover removal.
VIEW FULL ARTICLE →Related Builds
 Small Block Chevy 350 Build Pt. 10 | Checking out a new intake and talking about things left to do
 This 65 Mustang Keeps Throwing Curveballs
 Small Block Chevy 350 Build Pt. 6 | This Is How It's Actually Supposed To Be Done
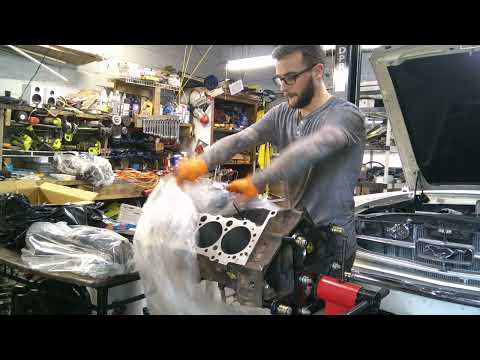 Small Block Chevy 350 Build Pt.3 | Filing rings and checking main clearances
 Cub Cadet Ultima Z2 54 5 hour +some maintenance video
 Small Block Chevy 350 Build Pt.5 | Continued frustrations with rod clearances
Parts Used (5)
Front timing cover gasket or seal kit for Gen 1 Coyote; may include crank seal depending on kit.
Full gasket set for both valve covers; commonly includes any small seals for the cover bolts.
Replace brittle rubber grommets under PCV fittings and spark plug tube seals if included.
Small tube for sealing corners or small areas as required by OEM procedure.
Fasteners sometimes replaced if corroded or stretched; many kits do not include these.