Project Front Loader: Pt1 testing our new stick welder
The video is the first part of a build called 'Project Front Loader' and focuses on unpacking and testing a newly acquired stick (SMAW) welder. The creator demonstrates setup, safety gear, practice welds on scrap steel, and initial tacks and adjustments that will be used when fabricating the loader components in later episodes.
Build Sequence
1. Unbox and inspect the new stick welder
Unpack the machine, inspect cables, earth clamp, electrode holder, and control panel. Confirm rated input and output specs and check for damage.
2. Set up a safe welding area
Clear a flat metal work surface (or use scrap steel as a workbench), ensure proper ventilation, position a fire extinguisher nearby, and don PPE (helmet, gloves, jacket).
3. Connect ground clamp and electrode holder
Attach the ground clamp to a clean area of the scrap steel, securely connect the electrode holder to the machine, route cables safely, and ensure good electrical contact.
4. Select electrode and set machine amperage
Choose an appropriate electrode (e.g., E7018) for the steel thickness, set the welder's amperage according to electrode and material thickness, and let the machine warm to operating state if needed.
5. Strike an arc and practice beads on scrap
Practice striking the arc, maintaining consistent arc length, and running beads along scrap plate and tubing. Adjust technique and amperage based on bead appearance and penetration.
6. Chip slag and inspect weld quality
Use a chipping hammer and wire brush to remove slag from practice welds, inspect for porosity, undercut, and penetration, and make notes for settings adjustments.
7. Tack pieces and check fit-up for loader mock-up
Square and clamp tubing and plate into approximate loader geometry, tack multiple locations to hold parts, then re-check measurements and fit before full welds in later parts of the project.
8. Adjust and document preferred settings
Record the electrode type, amperage, travel speed, and technique that produced the best practice welds for future reference during the actual loader fabrication.
Frequently Asked Questions
Can I start fabricating the loader after this video?
This video covers testing and practice plus initial tacks and mock-up; full fabrication and structural welding are planned for later parts, so ensure consistent practice and settings before proceeding to final welds.
VIEW FULL ARTICLE →What amperage should I set on a stick welder?
Amperage depends on electrode diameter and material thickness — the creator adjusts settings by testing beads on scrap until proper penetration and bead shape are achieved; start in the middle of the electrode's recommended range and fine-tune from there.
VIEW FULL ARTICLE →Related Builds
 Quick Cub Cadet Z2 Ultima 54 inch review
 Project Front Loader Pt 3: Starting to assemble the bucket!
 Poulan Pro PP19A42 Maintenance: Spindle Removal and Blade Sharpening
 Soothing Lawn Mowing June 19th 2026, Cub Cadet Z2 54
 First project vehicle and how I started it on fire
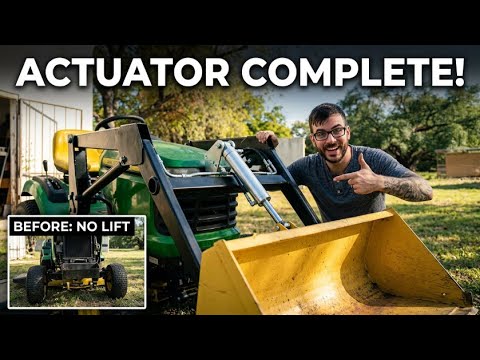 Project Front Loader Pt 6: Linear actuator and bucket install on lawn mower
Parts Used (7)
Common low-hydrogen stick rods used for clean fillet and butt welds on mild steel; used for practice and tacking.
Heavy-duty ground clamp to ensure good electrical connection to the workpiece.
Material used to practice welds and for initial loader mock-up/tacks.
Auto-darkening helmet used for eye protection during stick welding.