Project Front Loader Pt 3: Starting to assemble the bucket!
This video shows the beginning of assembling a front loader bucket: fitting and welding on mounting brackets, aligning the bucket to the loader arms, and installing wear pieces such as the cutting edge and corner bits. The build focuses on layout, tack-welding, drilling/boring pin holes, and preparing components for final welding, hardware installation, lubrication, and finishing.
Build Sequence
1. Layout and measure
Clean and measure bucket shell; mark locations for mounting brackets, pin centers and cutting edge bolt holes using tape measure and square. Verify symmetry between left and right sides.
2. Fit and tack brackets
Clamp mounting brackets in place and tack-weld them to the bucket in multiple spots to hold alignment. Re-check measurements and fitment to loader arms before final welding.
3. Drill pin and hardware holes
Using a drill (or drill press), bore the marked pin holes through brackets and bucket. Deburr holes and test-fit pins/bushings to ensure smooth insertion.
4. Weld final seams and gussets
Finish-weld the brackets and add gussets or internal backer plates to reinforce the mounting areas. Grind welds as required for fit and finish.
5. Install cutting edge and wear plates
Bolt on the bolt-on cutting edge and any corner wear plates; ensure even gap and torque bolts to spec. Add internal wear plate if used.
6. Install pins, bushings and grease fittings
Insert mounting pins with bushings, secure retaining hardware, and install grease fittings at pivot points. Verify smooth articulation on the loader.
7. Paint and final inspection
Apply primer and paint to welded areas to prevent corrosion, inspect all welds and hardware, and perform a fitment test on the loader to confirm alignment and function.
Frequently Asked Questions
How do I attach the cutting edge?
A bolt-on cutting edge is fastened to the bucket lip with high-strength bolts and backing plates; ensure holes are drilled square, bolts are tightened evenly, and use lock washers or thread locker to prevent loosening.
VIEW FULL ARTICLE →How do I ensure the bucket brackets are aligned properly?
Measure from consistent reference points on the bucket to the selected pin centers, clamp and tack both sides, then re-check diagonals and distances before final welding. Test-fit the pins to confirm alignment.
VIEW FULL ARTICLE →What safety precautions should I take during assembly?
Wear proper PPE (welding helmet, gloves, eye protection), clamp work securely, ensure ventilation when welding or grinding, and support the bucket safely when fitting heavy parts to prevent tipping or crush hazards.
VIEW FULL ARTICLE →Related Builds
 Quick Cub Cadet Z2 Ultima 54 inch review
 Poulan Pro PP19A42 Maintenance: Spindle Removal and Blade Sharpening
 Soothing Lawn Mowing June 19th 2026, Cub Cadet Z2 54
 First project vehicle and how I started it on fire
 Project Front Loader: Pt1 testing our new stick welder
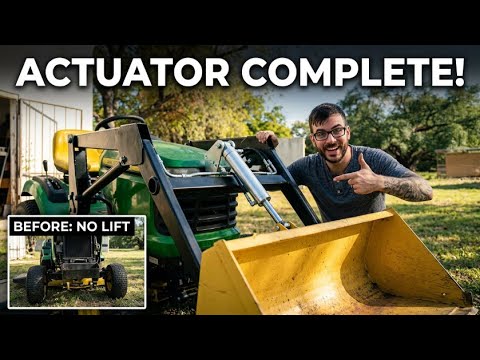 Project Front Loader Pt 6: Linear actuator and bucket install on lawn mower
Parts Used (9)
Main bucket body, assumed fabricated steel plate assembly used as the core of the bucket.
Brackets that weld to the bucket and accept loader pins or couplers.
Pin set for attaching bucket to loader arms; includes bushings where applicable.